


Installing an Add-on Page Template to your Showit website is simple. In this tutorial you will learn how to add a new page into your website design using a template from another designer, download, or purchase.
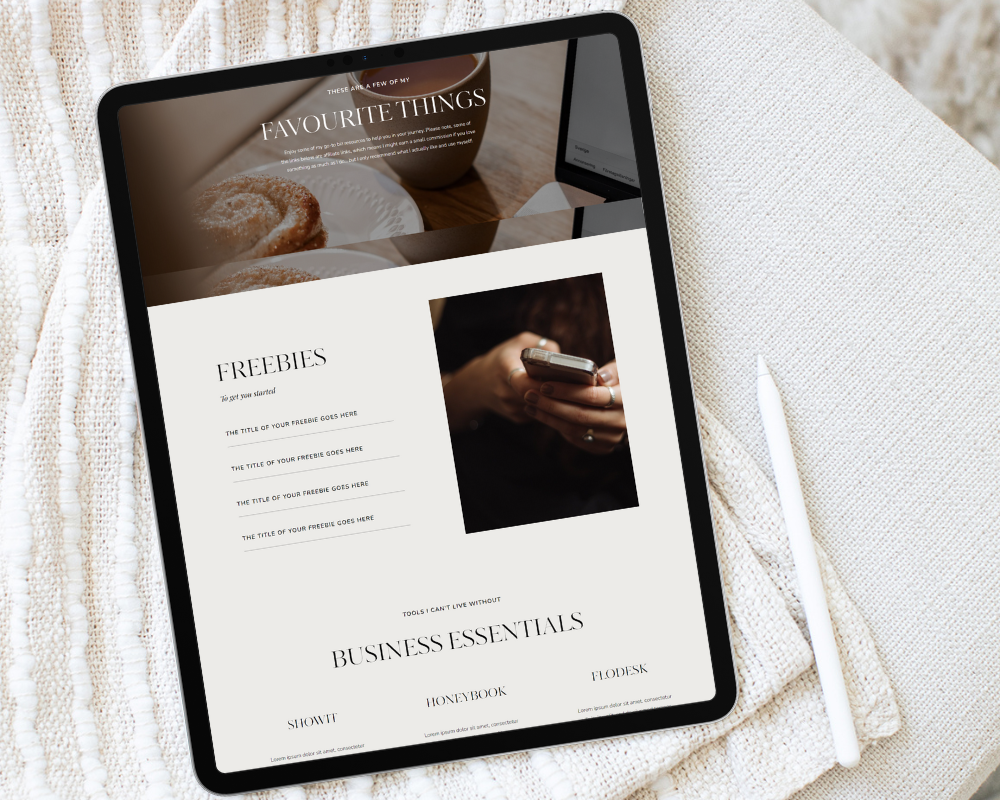
As you build out your website you may find you want to add a page from a different template. This is why we love Showit as you have full creative freedom to explore add-on pages from other templates and designers. Perhaps you want to add a resource page, or freshen up your blog layouts. Adding a new page to your site is super easy!
Skip ahead:
> Installing a template into your Showit account using a Design Share Key
> Import a new page template into your existing Showit website
> Customizing the page template with other site canvases (e.g., header and footer)
INSTALLING THE TEMPLATE TO YOUR SHOWIT ACCOUNT
Whether you choose to use one of Showit’s free templates, or purchase a template, you will be provided with a Design Share Key upon file download. This Design Share Key will be used to import the template design into your own Showit account.
- Highlight and copy the share key from the file received upon purchase and/or download
- Log in to your Showit account
- Select “Add to Library”
- Pase the share key into the dialogue box
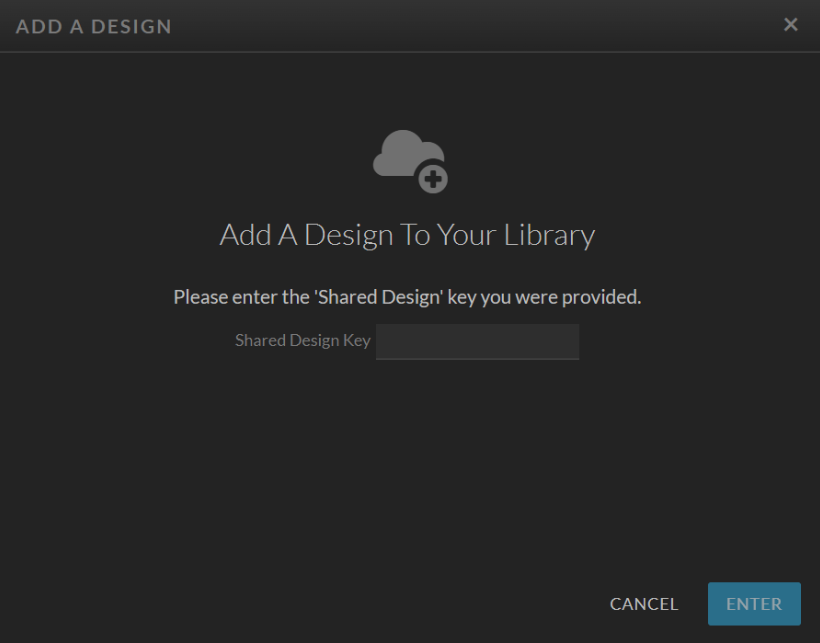
Now the template has been added to your library of available designs for you to use. This process is the same whether you are installing a full website, a single page, or a collection of canvasses.
IMPORTING ADD-ON PAGE TEMPLATE TO YOUR EXISTING SITE DESIGN
- Go to your design dashboard and open your website
- In the left navigation panel go to “PAGES” and “Select New Page”
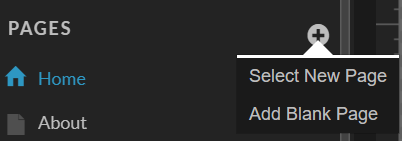
- Select the template you want to add from the “My Library” tab
- Click on the page so it is highlighted in blue
- Select either “APPLY MY FONTS & COLORS” or “USE ORIGINAL DESIGN”
- Click “ADD” – and the page template has been successfully copied into your website
Here’s a video that shows the steps in real time flow:
CUSTOMIZING THE TEMPLATE WITH SITE CANVASES
Now you can proceed to customize the page template as needed for your website. You will add your own content, images, and links where applicable. You may also want to add more canvases into the page so that it becomes more cohesive with your overall website – header and navigation, social bars, and your footer come to mind.
- Click the page tab so the page title is highlighted in blue
- Click the 3 dots and select “Add New Canvas”.
- Select from your site canvases. For example, MAIN MENU (header)
- Drag and drop the newly added canvas into the right position
- Repeat the process to add different canvases as required
Feeling more confident about freshening up your website knowing that you can explore other templates? Be sure to check out my template shop for more design inspiration!


